


Using Adobe Sign
Instructions for using Adobe Sign for forms that require signatures.
Complete & route a form
1. Find Username Emails
1. Find Username Emails
Find Humboldt username emails (abc123) for everyone who needs to sign your form. You will be asked to enter these emails before initiating the form. Don't use "name" emails with Adobe Sign.
Use the Adobe Sign Directory to look up Humboldt username emails.
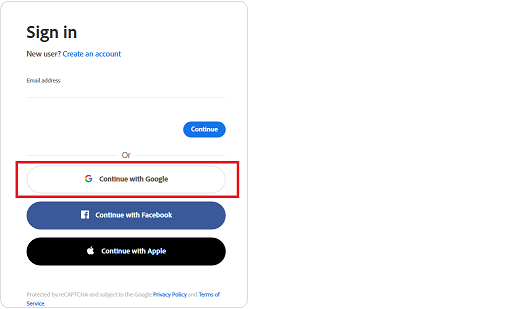
2. Sign in to Adobe Sign
2. Sign in to Adobe Sign
After you click the form link, you will be prompted to sign in, select the Continue with Google option.
[Note: If you encounter problems with Adobe Sign, make sure you are signed out of any personal gmail accounts and are signed in to your Humboldt gmail account.]
You will either be:
Automatically logged into your Adobe Sign account via Single Sign On (if you are already logged into your computer with your Humboldt credentials), or
Redirected to the Humboldt Authentication page where you will need to enter your Humboldt username and password.
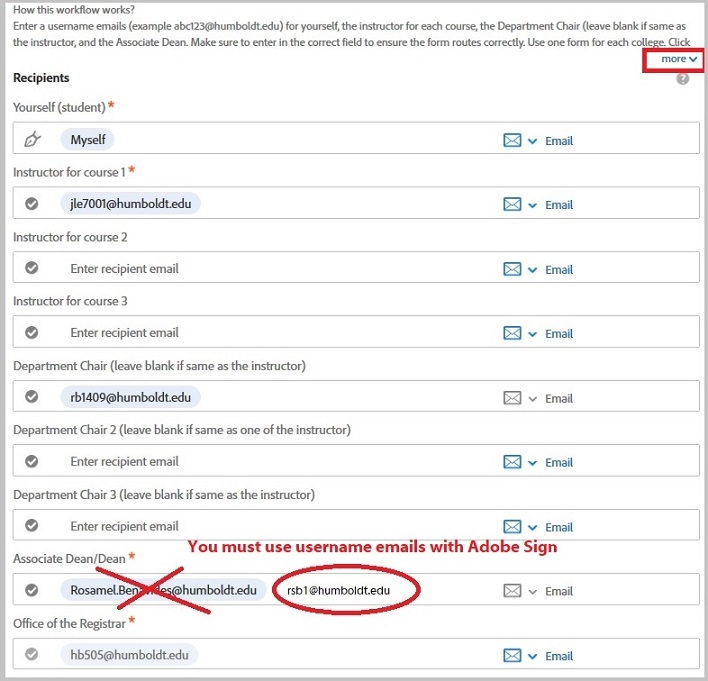
3. Enter emails
3. Enter emails
Once you are in Adobe Sign, enter Humboldt username emails as directed.
Click more to expand “How this workflow works?” so you can see all the instructions.
You must use Humboldt username emails with Adobe Sign. Do not use "name" emails.
A red asterisk by the recipient indicates that this is a required email.
Emails must be entered in the appropriate field to ensure correct routing.
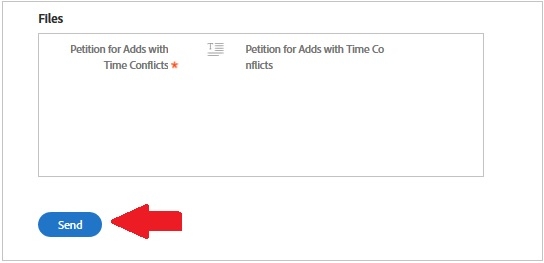
4. Initiate the form
4. Initiate the form
You will see the form in the Files box, continue to scroll down. Click Send to initiate the form.
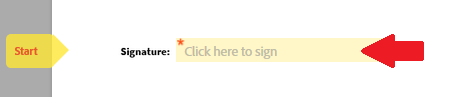
5. Complete & sign form
5. Complete & sign form
When the form opens, follow the prompts and complete the fields assigned to you.
Click on the signature field to add your signature.
An agree to terms banner will appear at the bottom. Click on the Click to Sign button to finish signing the document.

Adobe Sign Directory
Look up who needs to sign your form & username emails (requires login)
Additional help
Check status (Where's my form?)
Check status (Where's my form?)
You may check who has viewed or signed your form any time.
1. Go to Adobe Sign. You may want to bookmark this for future use.
2. If prompted, select the Continue with Google Option. You will either be automatically logged into your Adobe Sign account via Single Sign On (if you are already logged into your computer with your Humboldt credentials), or redirected to the Humboldt Authentication page where you will need to enter your Humboldt username and password.
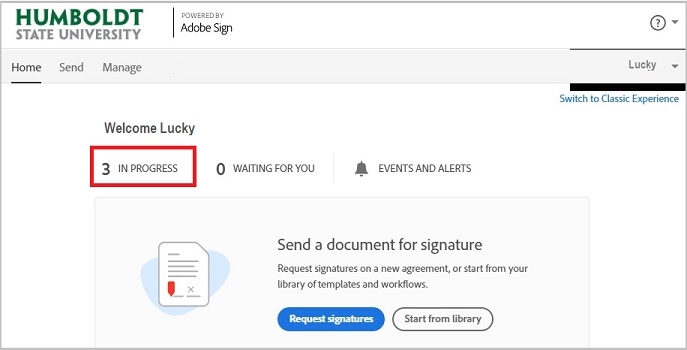
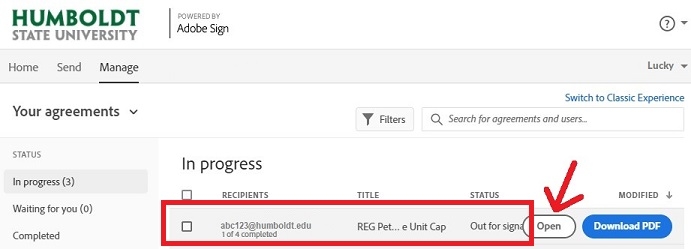
3. In the Home tab, click on IN PROGRESS
4. A list of your in progress documents will display. You can view next recipient and the number of steps completed on this page or click Open for additional details. In the example below, 1 of 4 steps are completed.
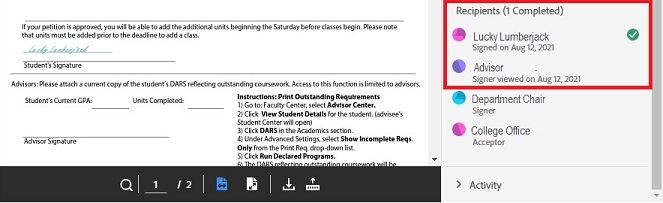
5. In the column to the right of your document, you can view the date you initiated the form and the date the a signer viewed and/or signed the form. In the example below, the advisor has viewed, but not signed the form.
Cancel a form
Cancel a form
If you resubmit a form, remember to go back a cancel the previous one.
1. Go to Adobe Sign.
2. If prompted, select "Continue with Google" option. You will either be:
Automatically logged into your Adobe Sign account via Single Sign On (if you are already logged into your computer with your Humboldt credentials), or redirected to the Humboldt Authentication page where you will need to enter your Humboldt username and password.
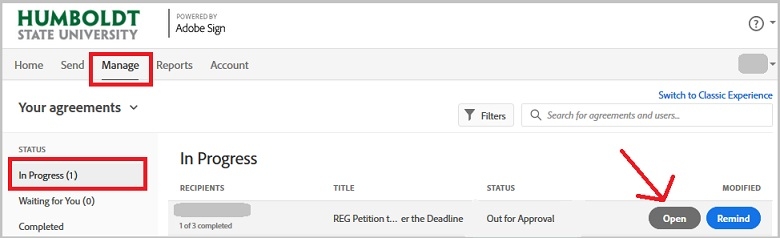
3. Click on IN PROGRESS
Locate the document you want to change. Click on Open.
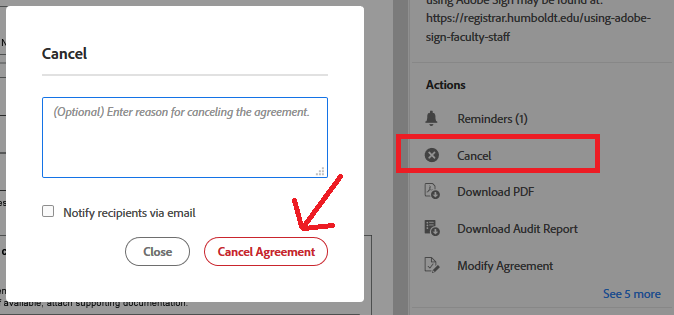
4. In the column to the right of the document, click on Cancel.
5. In the box that opens, enter your reason for canceling the agreement.
6. Check the box to notify recipients and click on Cancel Agreement.
Correct a recipient
Correct a recipient
You can correct an email or change who will sign your form.
1. Go to Adobe Sign.
2. If you are prompted, select the Continue with Google Option. You will either be automatically logged into your Adobe Sign account via Single Sign On (if you are already logged into your computer with your Humboldt credentials), or redirected to the Humboldt Authentication page where you will need to enter your Humboldt username and password.
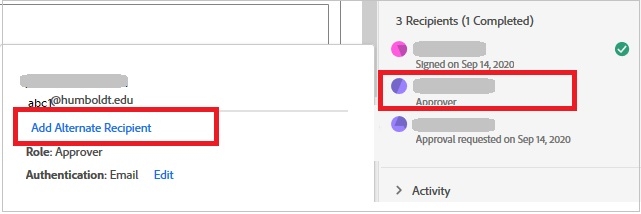
3. From the Manage tab, click the document you want to edit.
4. Mouse over the current recipient (right side). [You can only replace the current recipient of the agreement. If you need to change a signer that is later on in the process, wait until it is their turn to sign.]
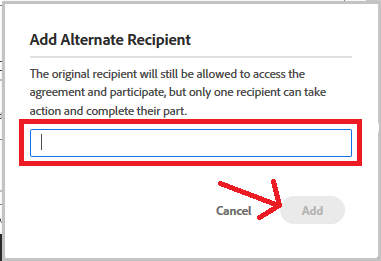
5. An information bubble will open. Click Add Alternate Recipient.
6. Enter the correct Humboldt username email. Click Add.
Disclosure of Student Information
We take your privacy seriously. Read more about the Family Educational Rights and Privacy Act (FERPA).